

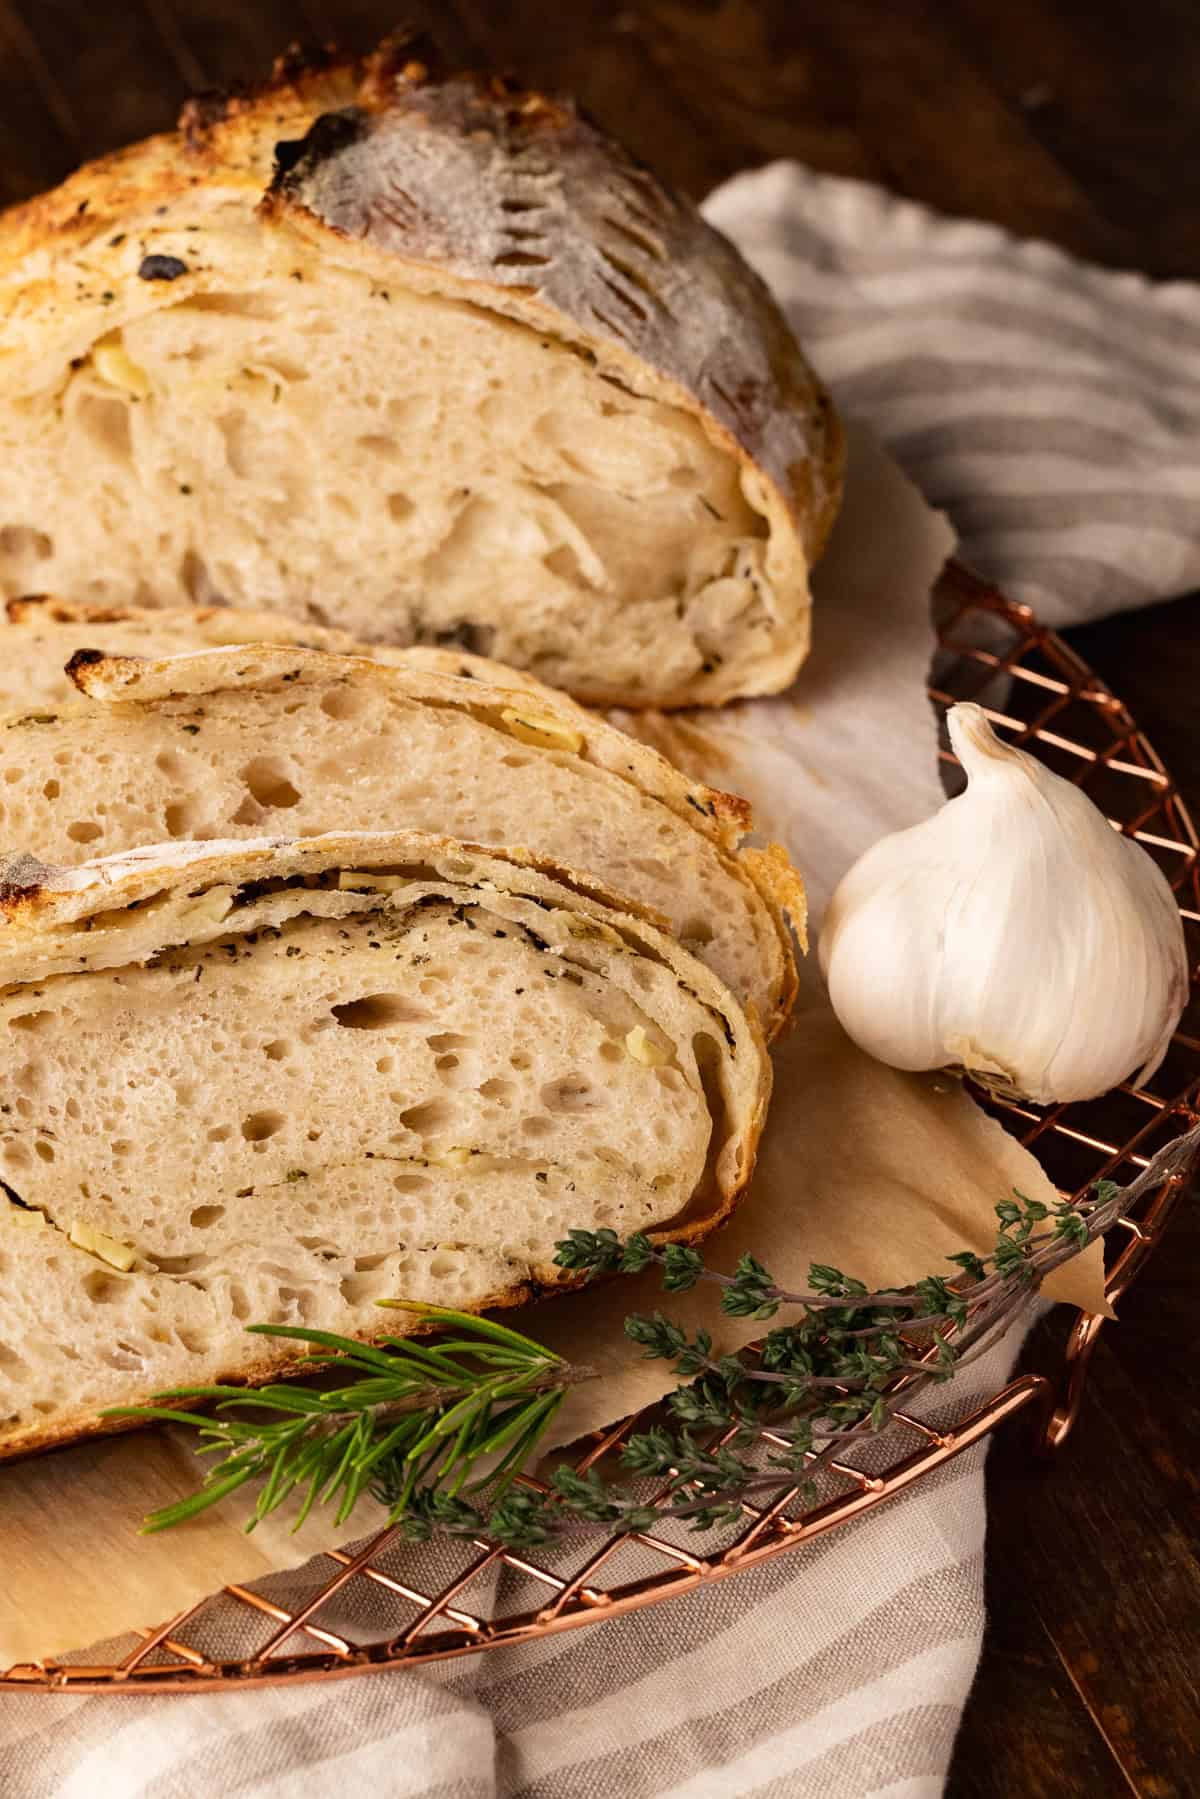
This garlic and herb sourdough is a simple way to take a classic sourdough loaf up a notch. Fresh garlic, rosemary, thyme, and Parmesan add plenty of savory flavor without making the dough complicated, making this a great recipe to try if you're new to sourdough inclusions.

Recipe Highlights or TL;DR
- Simple ingredients, big flavor
- A simple twist on classic sourdough bread
- A great way to use fresh herbs from the garden
- Loaded with garlic and optional Parmesan. Try roasted garlic sourdough next!
- Crispy, golden crust with a soft, chewy center
- Delicious alongside soups and stews or simply slathered with butter
Jump to:
- Recipe Highlights or TL;DR
- Ingredients
- Equipment Notes:
- How to Make Sourdough Bread Dough
- How to Stretch and Fold Sourdough Bread Dough
- How to Bake Garlic and Herb Sourdough
- Pro Tips
- Baker's Schedule:
- Variations
- Storage
- Serving Suggestions
- Recipe FAQs
- More Sourdough Recipes
- Did you try this recipe?
- 📖 Recipe
- Comments
Ingredients
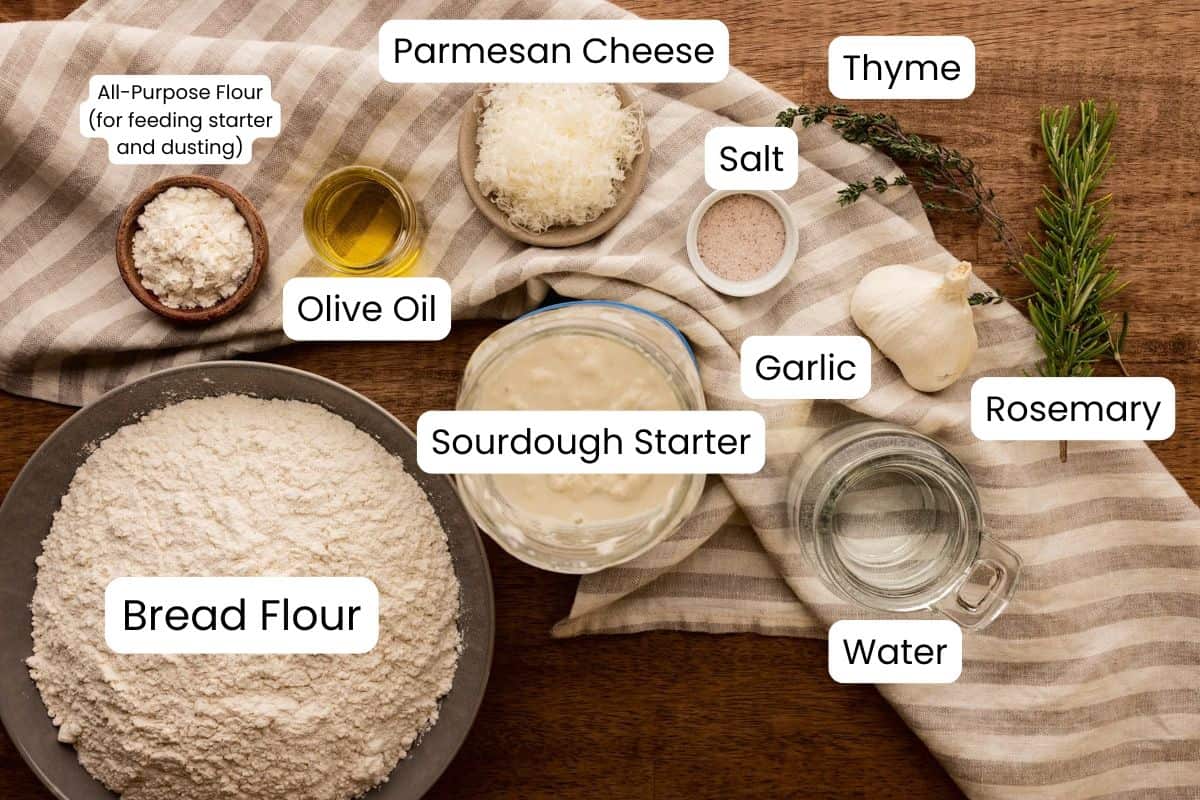
- Sourdough Starter: Sourdough starter can either be made at home or purchased in various forms (typically dried). I used this guide for making a sourdough starter and it hasn't failed me yet. You can also ask a baking friend to share some! It's important to note that sourdough starters are all different in yeast cultures, consistency, yeast activity, etc. and it may take time to figure out how your starter works with specific recipes.
- All-Purpose Flour: When choosing a flour to feed your sourdough starter, select an unbleached flour. Bleached flour likely won't ruin your starter, but I get good results with unbleached all-purpose flour.
- Bread Flour: Not all bread flours are created equal. The protein content and type of wheat used can drastically affect the outcome of your bread. I get the best results with King Arthur bread flour which has a higher protein content than most bread flours. That's not to say you can't use any type of bread flour, but you may have to test the recipe a few times and adjust it to your liking.
- Salt: I use Redmond Real Salt for bread, which is unrefined and has a lower sodium content per gram than regular table salt. If you are using refined table salt, cut the salt down to 8-9 g to make up for the higher sodium content.
- Inclusions: Fresh garlic adds a bold, savory flavor, while thyme and rosemary bring earthy, aromatic notes to the loaf. You can substitute dried herbs for fresh (use about one-third the amount) or swap in your favorite herbs, such as oregano or sage. Grated Parmesan adds a salty, cheesy flavor that pairs beautifully with the herbs, but it's optional if you prefer to leave it out.
See recipe card for quantities.
Equipment Notes:
Disclaimer: I know this looks like a lot of equipment! There are a couple of essential pieces of equipment for this recipe and several optional pieces of equipment. You certainly don't need all of them. Read below for which pieces are essential, alternatives, and my favorites!

- Dutch Oven (essential): A cast iron Dutch oven is the perfect vessel for creating a crisp crust while also allowing the bread to rise during the baking process. You can also use a stoneware bread baker.
- Kitchen Scale (essential): A digital kitchen scale is a baker's best friend. Sure, you can measure out the ingredients with measuring cups. But, to get more precise, consistent results, a digital kitchen scale should be used.
- Parchment Paper (essential): Parchment paper is super handy for baking sourdough. It makes a great surface to transfer the dough from counter to Dutch oven to cooling rack and also keeps the dough from sticking to the Dutch oven.
- Banneton (optional): A banneton is a basket specifically made for proofing bread dough. You can also use a cloth-lined bowl in place of a banneton. Bannetons come in two shapes boule (round) and batard (oval). There are many sourdough kits that contain bannetons and other tools listed above.
- Dough Whisk (optional): A dough whisk is great for mixing dough but it isn't necessary. You can mix this dough with your hands or another clean kitchen utensil as well.
- Long Silicone Spatula (optional): You can stir your sourdough starter with any clean kitchen utensil that works for you. But this long silicone spatula is just the right size and shape to effectively stir the starter and scrape down the sides of the jar.
- Silicone Bowl Scraper (optional): A silicone bowl scraper is a handy tool for removing sticky dough from a bowl. I highly recommend getting one!
- Bench Scraper (optional): A bench scraper is a handy tool when it comes to shaping sourdough. But, you can also shape sourdough with your hands.
- Bread Lame or Razor (optional): A bread lame is essentially a fancy razor blade holder and isn't necessary for scoring bread. However, a razor blade or sharp knife is essential for scoring the dough.
- Bread Knife (optional): A good sourdough loaf can be hard to slice with a typical bread knife due to its crusty exterior and soft interior. I recommend a sharp knife with scalloped teeth like this scalloped offset bread knife. As an added bonus, the offset shape keeps you from rubbing your knuckles on the cutting board!
How to Make Sourdough Bread Dough
Making the dough is probably the easiest step in sourdough bread baking. Follow the simple steps below!


How to Stretch and Fold Sourdough Bread Dough
Stretching and folding is the term used for a no-knead method for making bread dough. The process is quite literally what it sounds like: a series of stretching the dough and folding it over itself until the desired texture is achieved. The goal is to develop the gluten fibers by stretching them which gives your bread structure.
First Round


Second Round


Third Round


Fourth (Final) Round


How to Shape a Garlic and Herb Sourdough
The instructions below are for shaping a batard (oval) loaf. See the recipe card for instructions on shaping a boule (round) loaf.
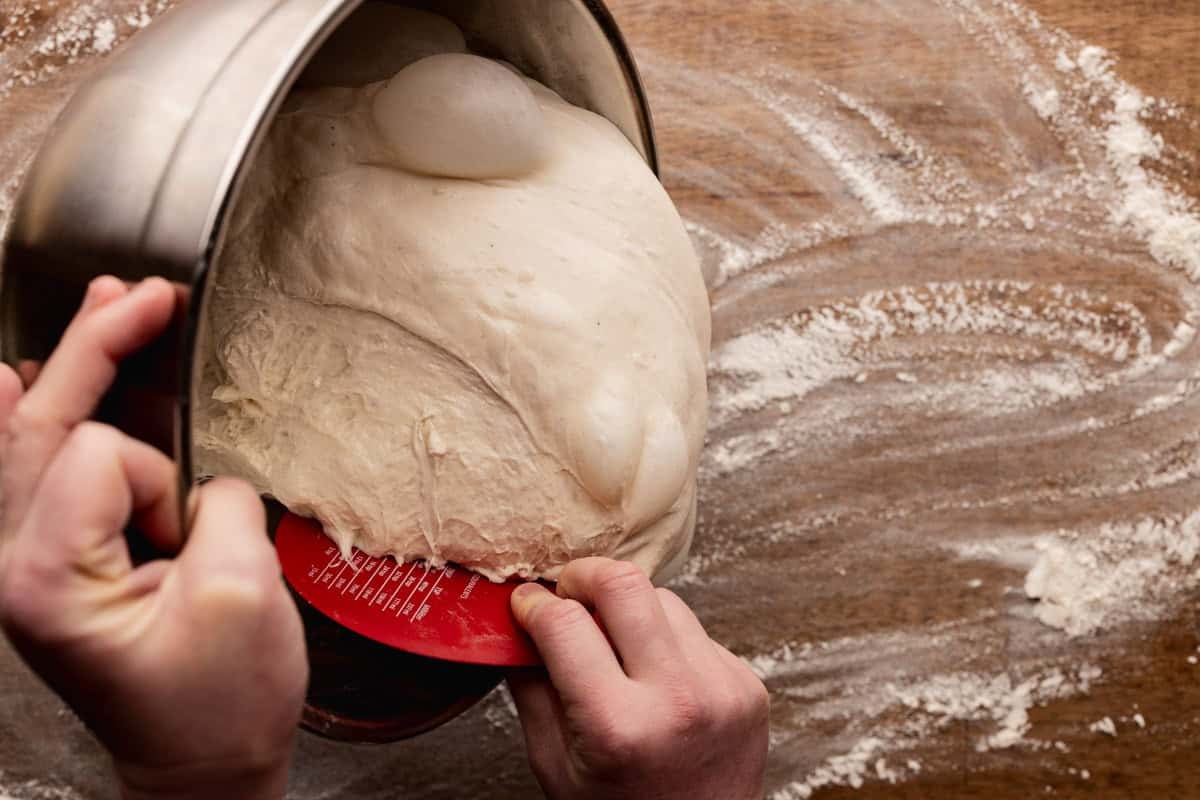
Step 1: The next morning, remove the dough from the bowl onto a lightly floured work surface.
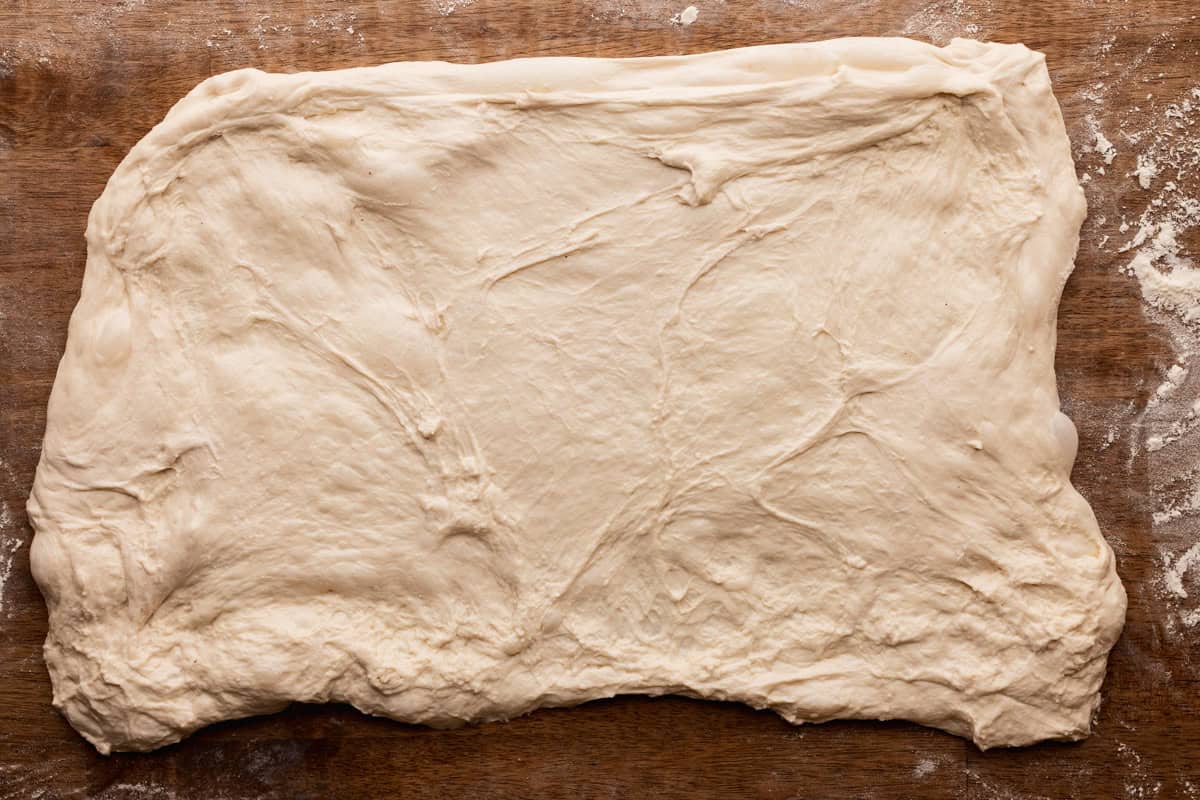
Step 2: Gently pull the dough into a large rectangle (about 10" x 16") if you're shaping a batard or into a large circle if you're shaping a boule.
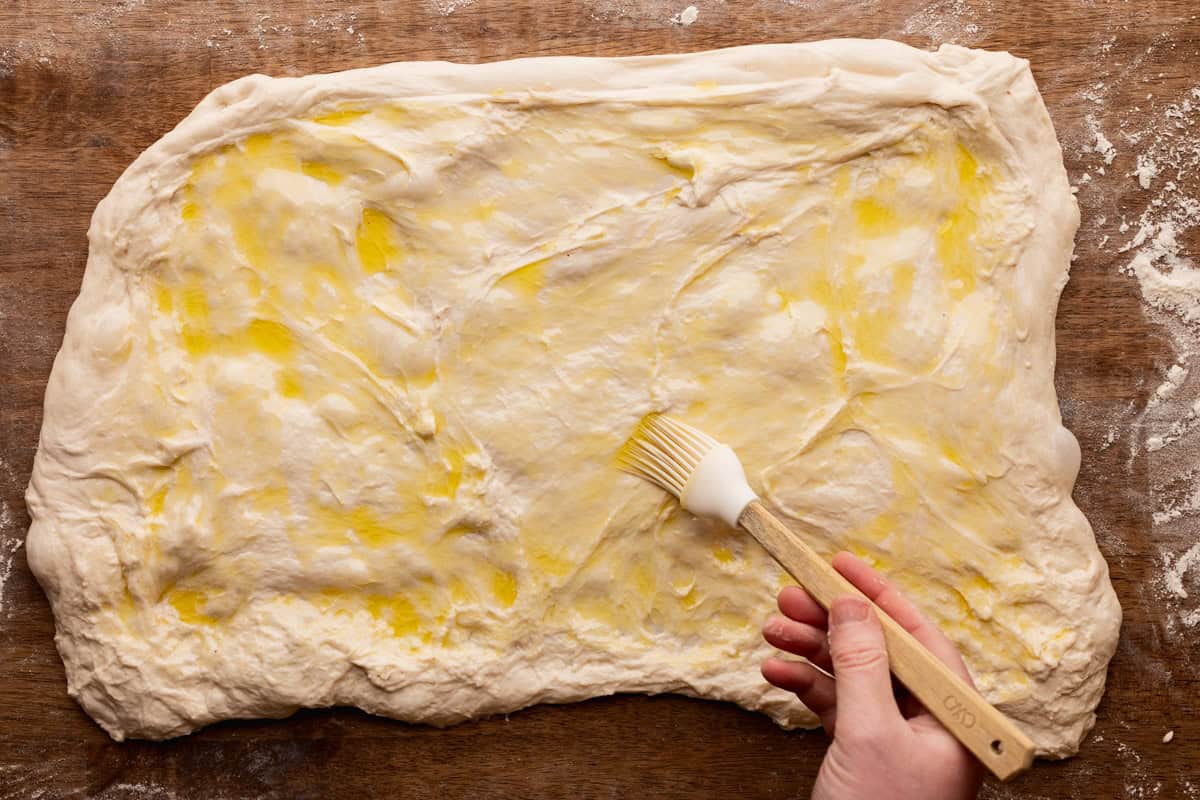
Step 3: Brush the olive oil evenly over the surface of the dough rectangle.
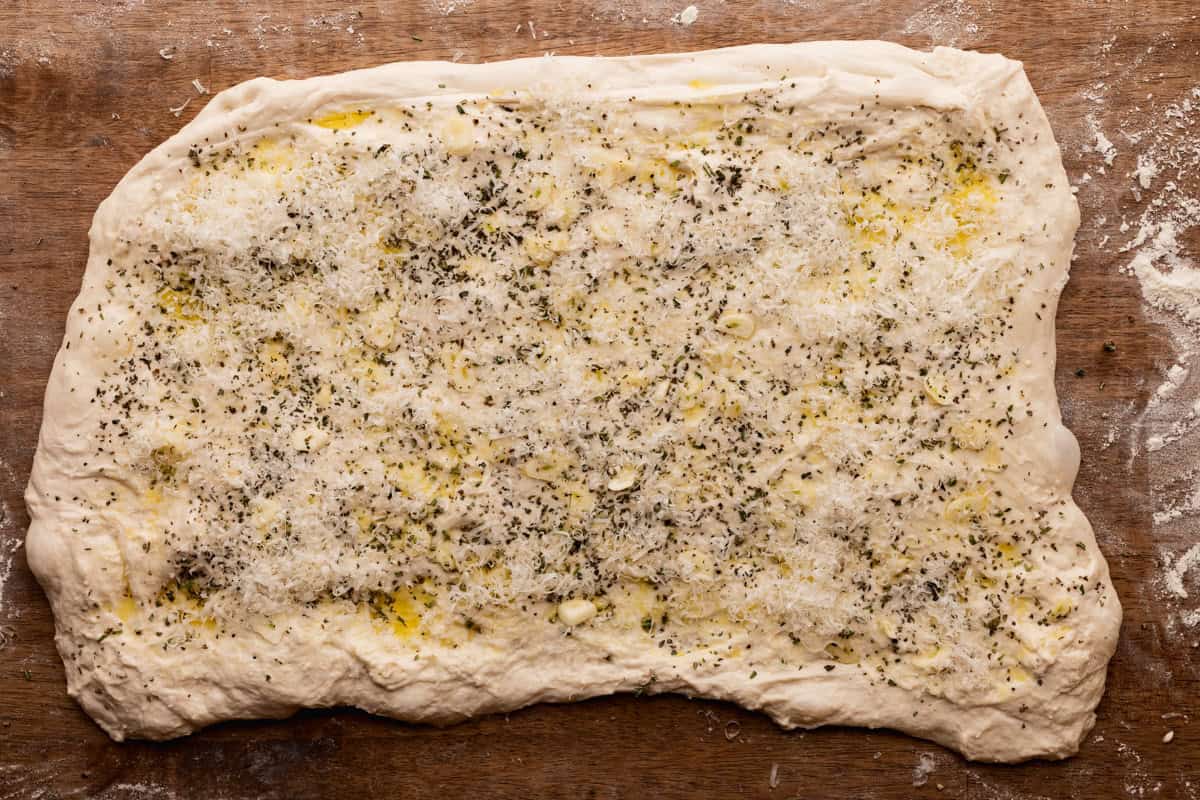
Step 4: Scatter the garlic slices evenly over the dough, followed by the chopped herbs. Finish by sprinkling Parmesan cheese over the top, if using.
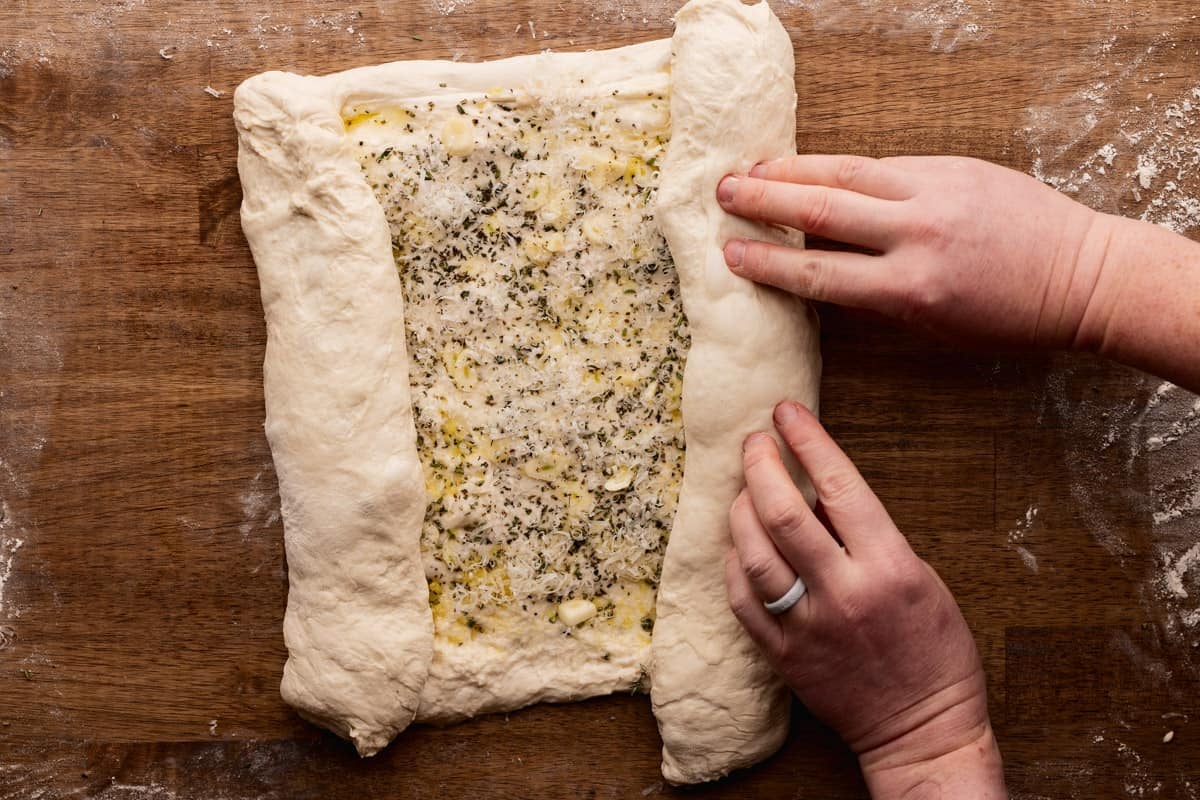
Step 5: Roll the two short outer edges of the dough inward toward the center until they meet.
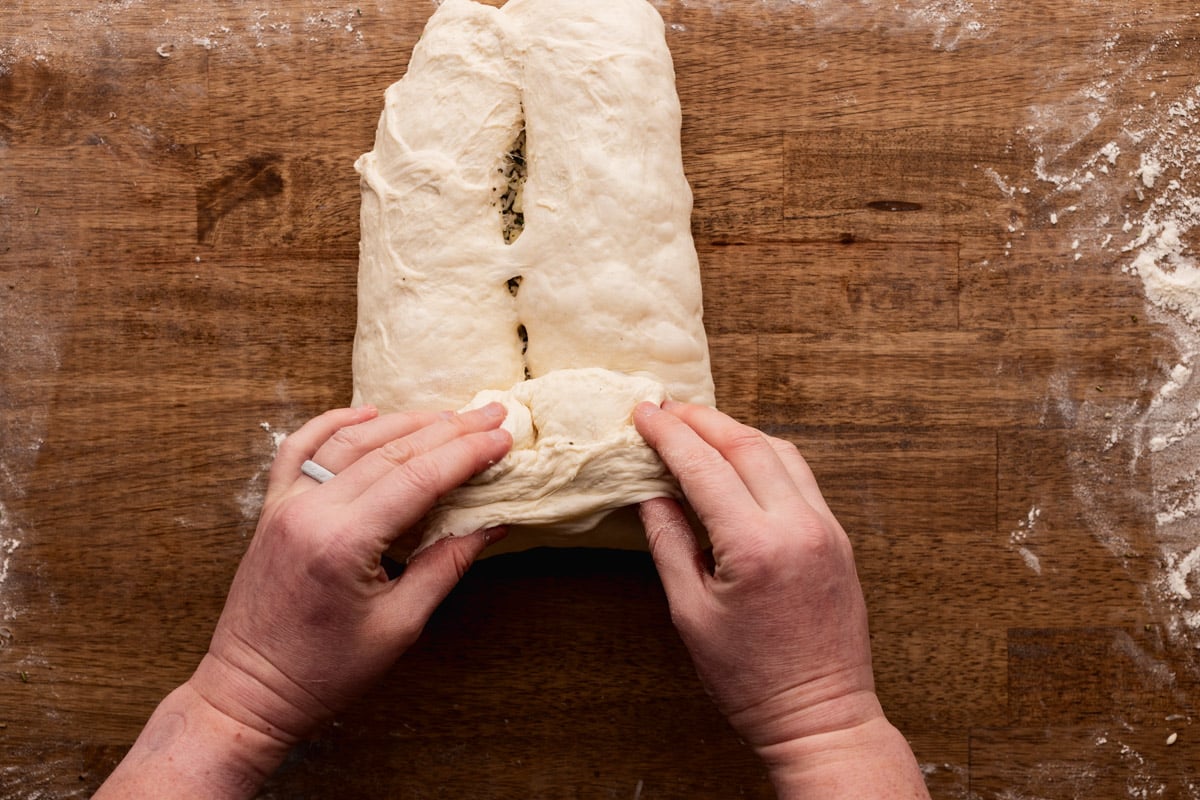
Step 6: Then, starting from the bottom edge closest to you, roll the dough up tightly into a cylinder.
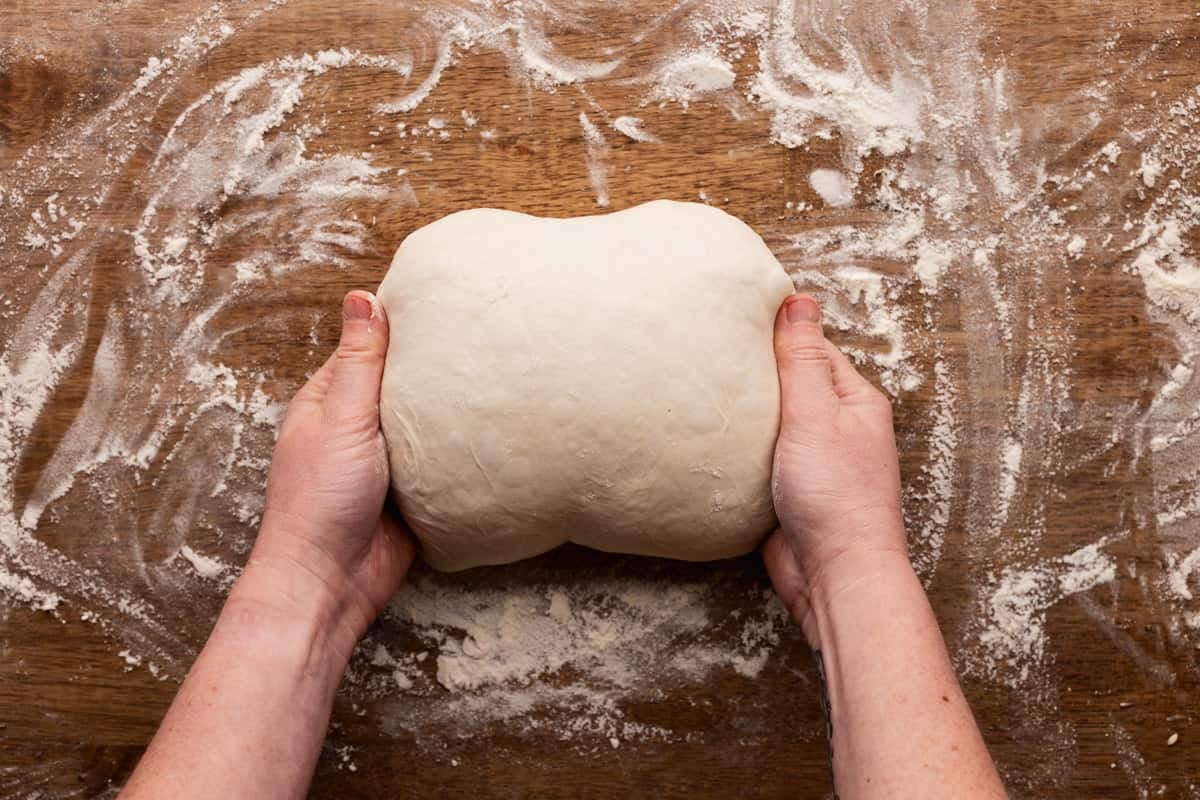
Step 7: Fold the short ends of the dough under the dough ball.
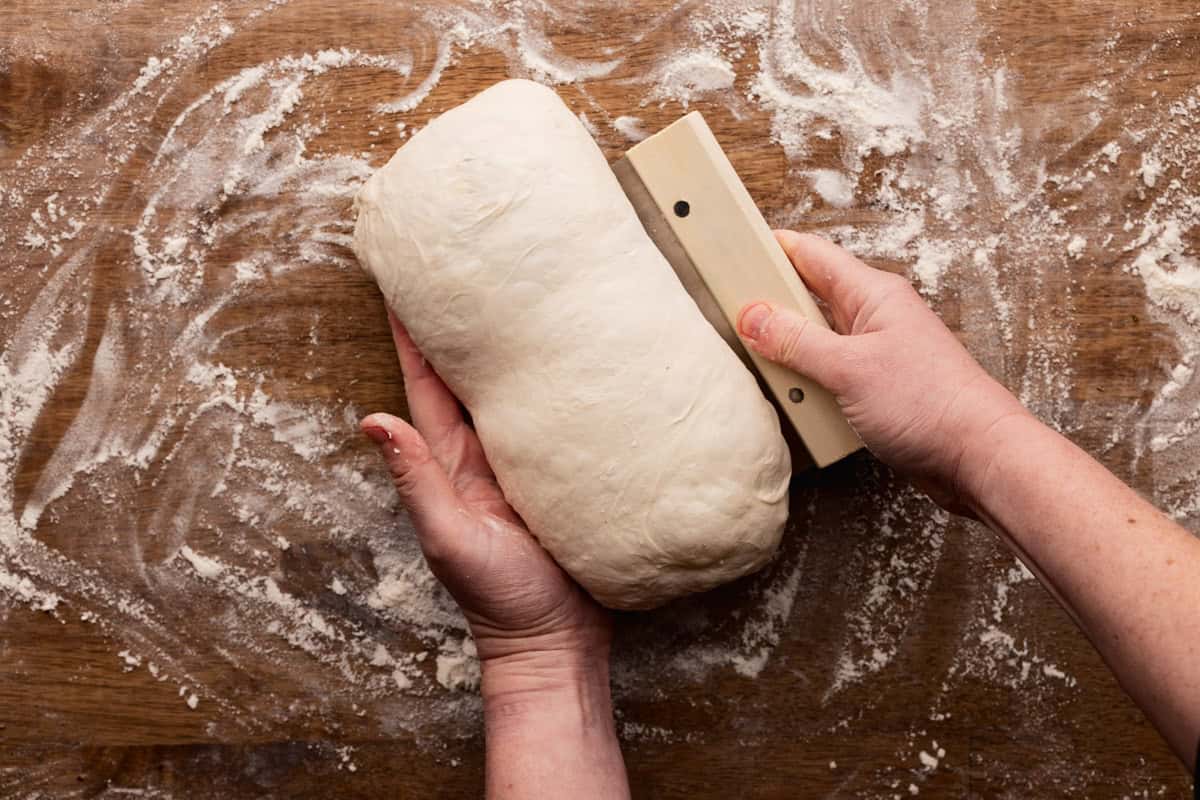
Step 8: Use a bench scraper to pull the long sides of the dough under the bottom and shape the dough into a more uniform cylinder.
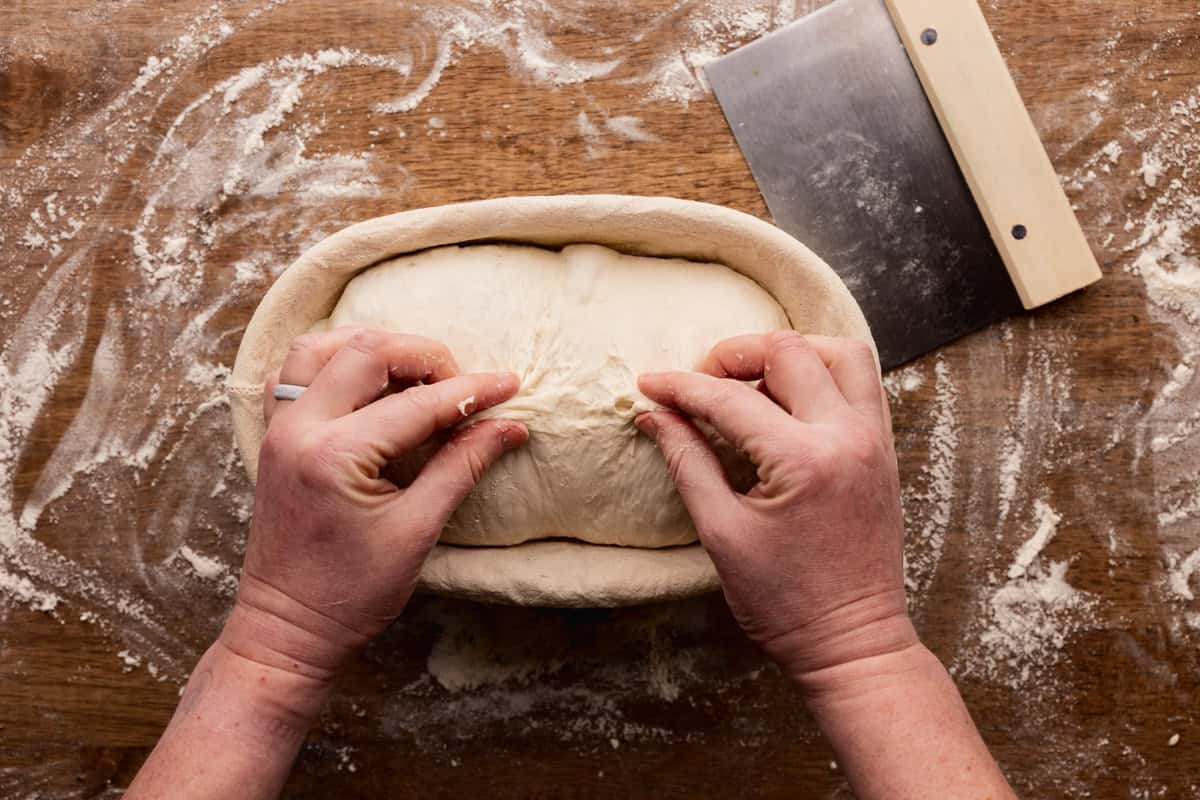
Step 9: Place the shaped dough seam-side up in a floured banneton or cloth-lined bowl. Seal the bottom edges of the dough ball together.
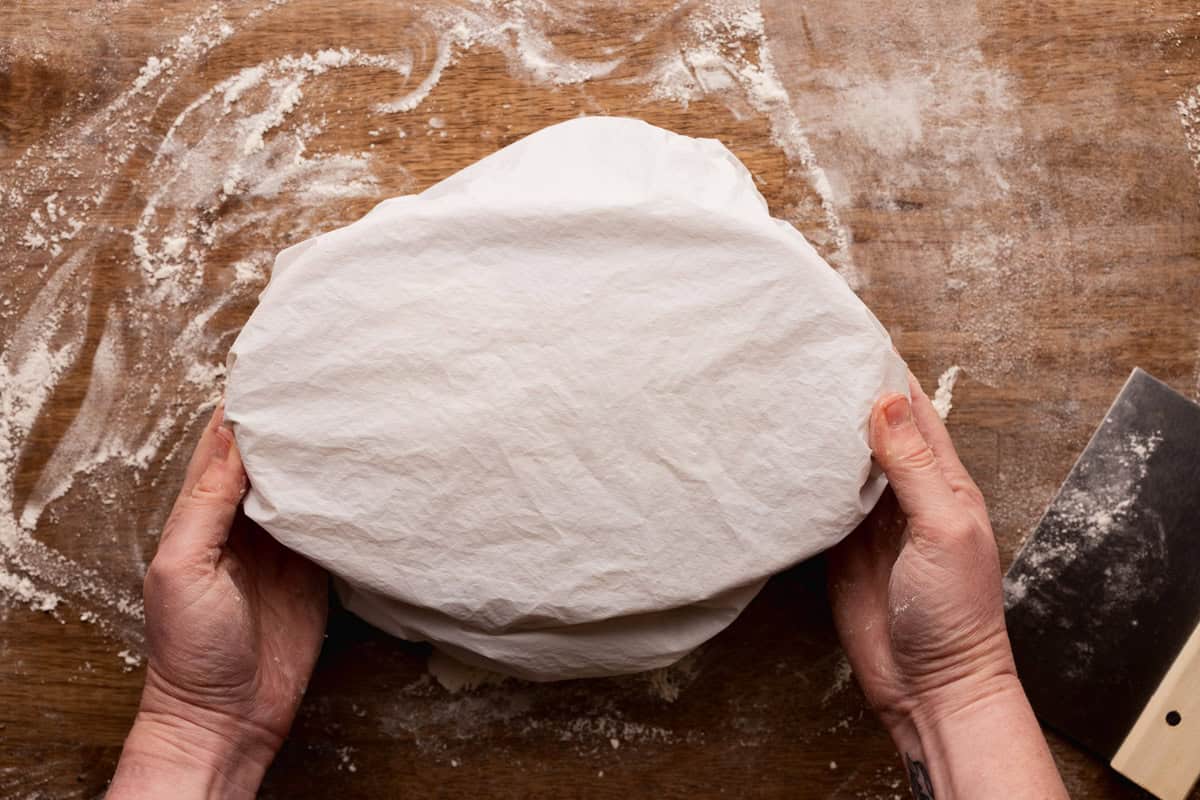
Step 10: Cover the banneton and refrigerate for at least 1 hour or up to 24 hours for a really crispy crust. The sweet spot is around 3-4 hours for this recipe.

Step 11: Place the shaped dough seam-side up in a floured banneton or cloth-lined bowl.

Step 12: Seal the bottom edges of the dough ball together. Cover the banneton and refrigerate for at least 1 hour or up to 24 hours for a really crispy crust. The sweet spot is around 3-4 hours for this recipe.
How to Bake Garlic and Herb Sourdough
This sourdough bread is baked in a Dutch oven. See below for specific instructions!

Step 1: Place the Dutch oven in a cold oven and preheat it to 500°F. Preheat for at least 1 hour.
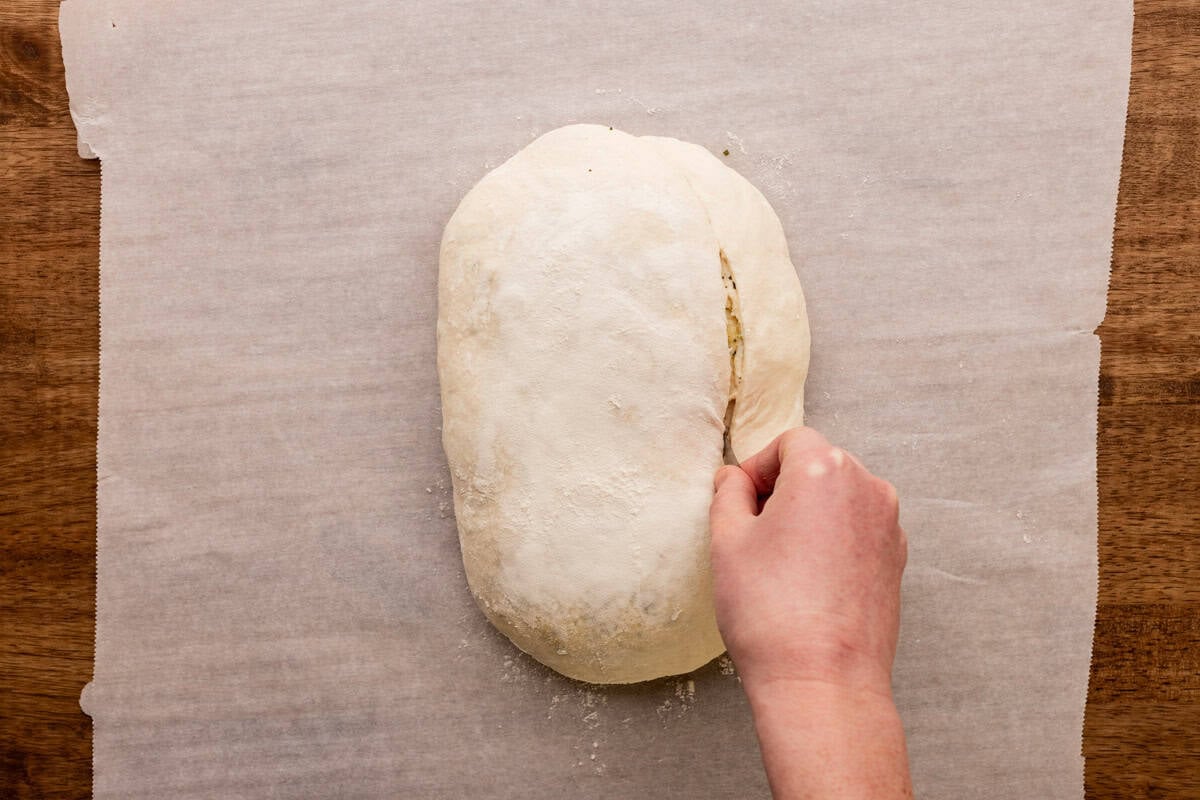
Step 2: Place the shaped dough, seam side down, on a piece of parchment paper. Score it with a razor blade, bread lame, or sharp knife. It needs at least one big slash on the side of the dough to let out steam as it rises.
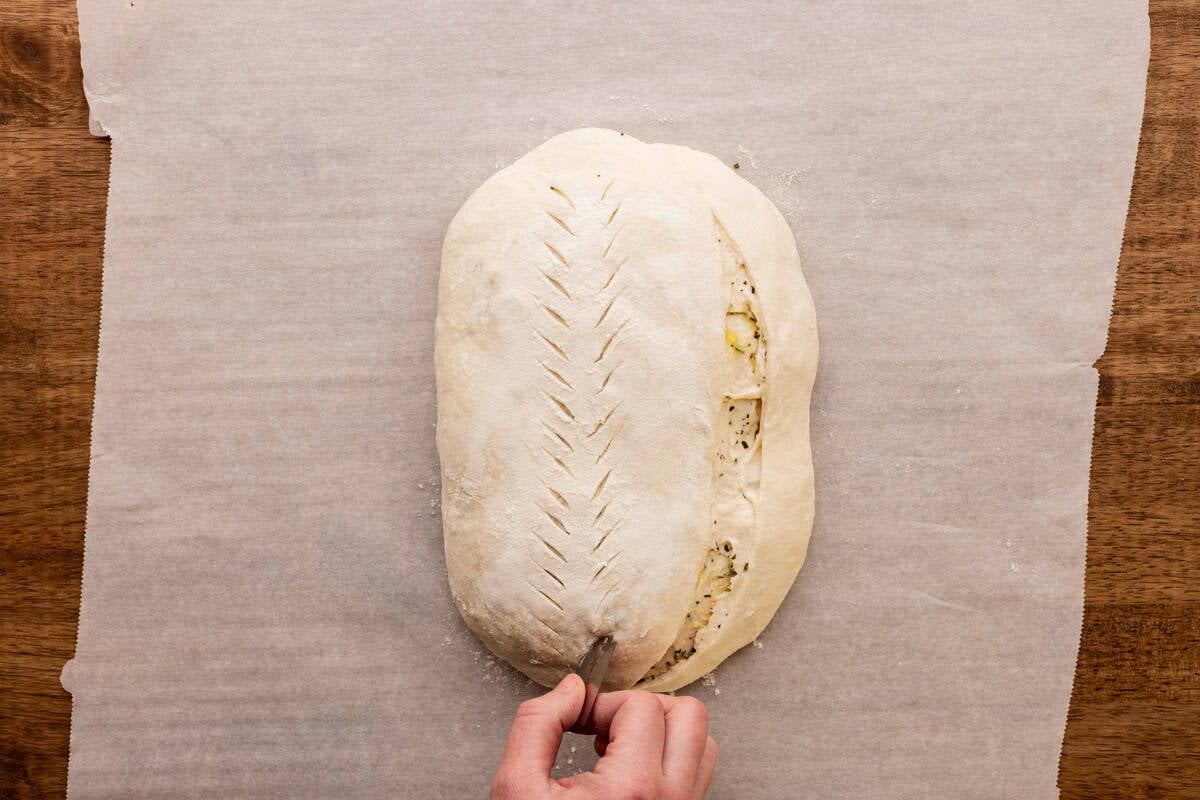
Step 3: You can add decorative scoring as well, but it isn't necessary.
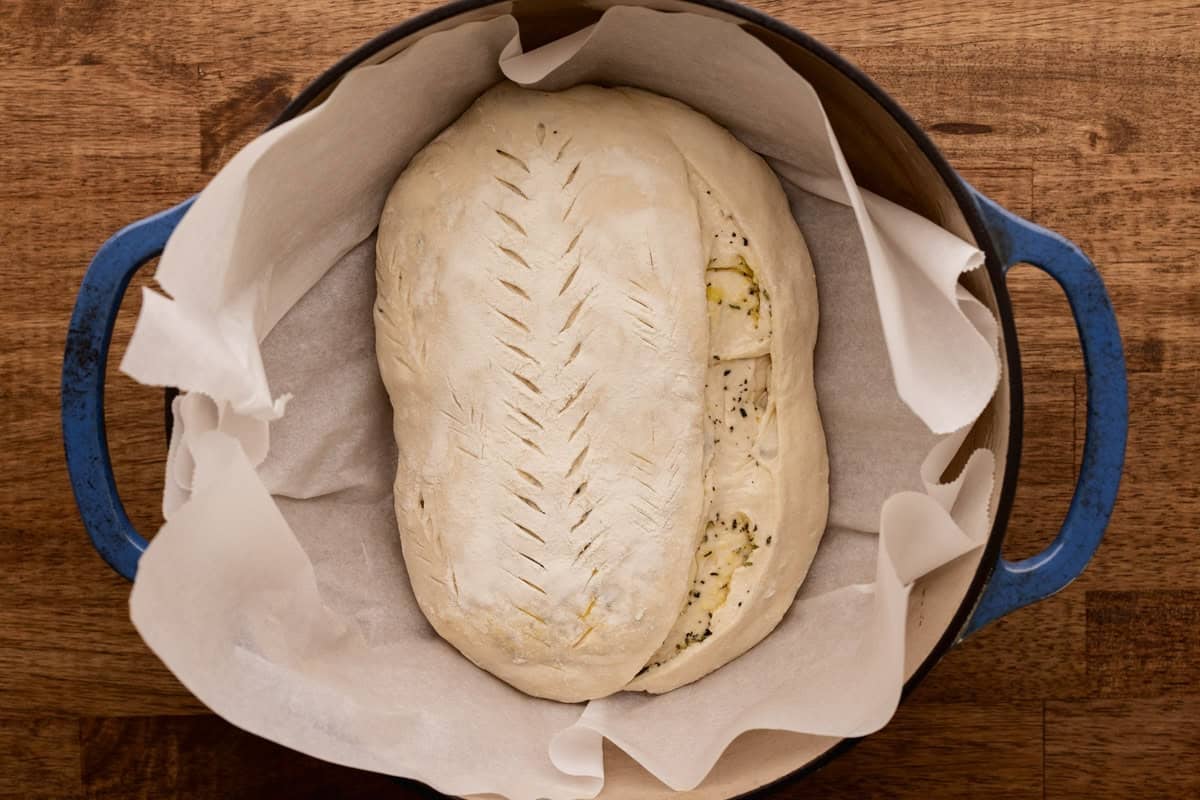
Step 4: Place the dough on parchment paper in the preheated Dutch oven and cover it with the Dutch oven lid. Reduce the oven heat to 450°F. Bake for 23 minutes.
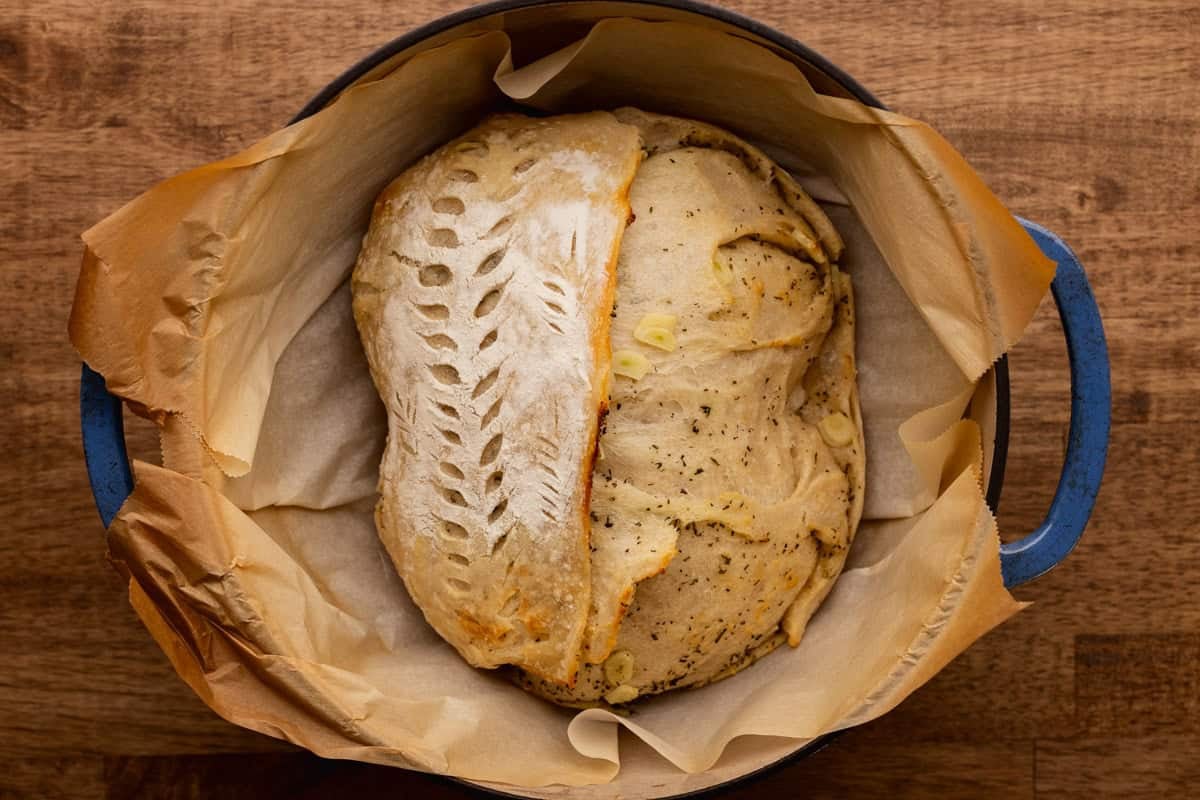
Step 5: Remove the lid and bake for an additional 12-14 minutes.
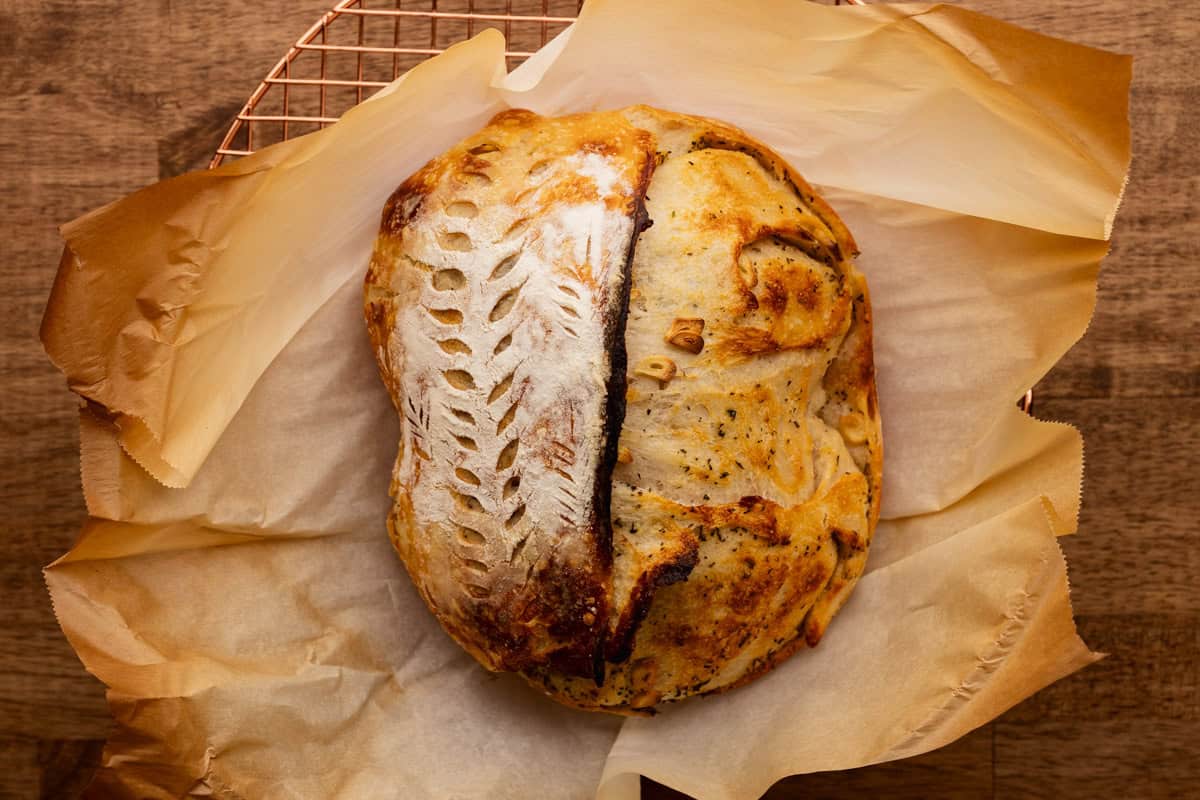
Step 6: Remove the bread from the oven and let it cool completely on a wire rack.
Pro Tips
- Use an active starter. Your starter should be bubbly and active before you begin. A sluggish starter can result in a dense loaf.
- Don't rush the dough. Sourdough timing can vary depending on the temperature of your kitchen and the activity of your starter. Look at the dough, not just the clock. It should become noticeably smoother, puffier, and more elastic as it ferments.
- Don't worry about perfect timing. The stretch-and-fold intervals are flexible. If life gets in the way and you go 45 minutes instead of 30, your bread will survive.
- Build good surface tension. Take your time when shaping the loaf. A tight outer surface helps the dough hold its shape and encourages a better rise in the oven.
- Don't skimp on the preheat. Give the Dutch oven plenty of time to heat up. Starting with a thoroughly preheated pot helps create that signature sourdough crust.
- Let it cool! I know. It's hard. But cutting into hot sourdough can give you a gummy interior. Let the loaf cool completely before slicing.
- Soften the crust if you prefer. Once the bread has cooled completely, placing it in a zippered bag or airtight container for a few hours allows the moisture from the center to soften the crust and makes it easier to slice.
Baker's Schedule:
With longer recipes like this, it can be hard to picture how long it will really take. See below for my typical sourdough baking schedule. Of course, you can adjust the times to fit your schedule.

Variations
- Garlic powder: Swap the fresh garlic for 1-2 teaspoons of garlic powder for an easier, more evenly distributed garlic flavor.
- Dried herbs: Use dried thyme, rosemary, oregano, or Italian seasoning in place of fresh herbs. Start with about 1 teaspoon total and adjust to taste.
- Cheesy garlic herb: Swap the Parmesan for shredded cheddar or Gouda.
- Garlic herb butter: Instead of olive oil, spread softened garlic herb butter over the dough before adding the herbs. This makes an especially rich, savory loaf.
Storage
Store cooled bread at room temperature in a bread bag, zippered bag, or airtight container for up to 3-4 days. The crust will gradually soften as the bread sits.
For longer storage, slice the bread and freeze it in an airtight freezer bag for up to 3 months. You can pull out individual slices and toast them straight from frozen.
Serving Suggestions
This garlic and herb sourdough is perfect for dunking into soups and stews, like Dutch oven venison stew or elk and wild rice soup. It's also delicious alongside roasted meat like this crock pot elk roast, pasta, or a simple salad.
Or skip the fancy serving suggestions and eat a warm slice slathered with butter. That's a perfectly respectable dinner.
Recipe FAQs
Thyme and rosemary are a great combination for this garlic sourdough, but you can use almost any fresh culinary herbs you enjoy. Sage, oregano, chives, basil, and parsley can all work well. For the strongest flavor, use about 1-2 tablespoons of fresh herbs total.
For this recipe, the fresh herbs are added during shaping along with the garlic, olive oil, and Parmesan. Adding them at this stage keeps the dough simple during fermentation and creates pockets of garlic and herbs throughout the finished loaf.
Yes! Raw garlic can be added to sourdough, but thinly slicing it helps it soften and mellow as the bread bakes. You can also sauté the garlic in the olive oil first for a softer, sweeter garlic flavor.
Absolutely. Garlic powder and dried herbs are an easy substitute. Dried herbs have a more concentrated flavor than fresh, so you'll need less.


Did you try this recipe?
Let us know what you thought by leaving a comment below and sharing it on Instagram, Facebook, and Pinterest!
Thank you!
Annie
📖 Recipe
Garlic and Herb Sourdough
Equipment
- Large Mixing Bowl
Ingredients
Bread Dough
- 125 g active sourdough starter
- 350 g lukewarm water
- 10 g fine sea salt
- 500 g bread flour
Inclusions
- 2 tablespoon extra virgin olive oil
- 2 tablespoon garlic, thinly sliced
- 1 ½ teaspoon fresh thyme, finely chopped
- 1 ½ teaspoon fresh rosemary, finely chopped
- ½ cup parmesan, grated (optional)
Instructions
Dough:
- To a large mixing bowl, add 125 g of active sourdough starter and 350 g of lukewarm water. Whisk the mixture with a dough whisk until the starter is somewhat dispersed in the water. It doesn't have to be a homogenous mixture.
- Add 10 g of salt and 500 g of bread flour. Stir with the dough whisk until a shaggy dough forms. Cover the bowl and let it rest for 30 minutes. I like to use a shower cap to cover my bowl and banneton so I don't use a bunch of plastic wrap and they're easier to fit around the bowl.
- Use a silicone bowl scraper to pull the dough away from the bowl edges. Gently stretch the dough between your hands. Then fold the dough in half, grab the sides with the seams, and stretch it in the opposite direction. Repeat until dough starts to feel tight and resists stretching, about 3-4 times. Cover the bowl and let the dough rest for 30 minutes.
- Repeat the stretching, folding, and resting process 3 more times. Cover the dough and let it sit on the counter overnight, about 8-12 hours.
Shaping and Baking:
- The next morning, remove the dough from the bowl onto a lightly floured work surface. Gently pull the dough into a large rectangle (about 10" x 16") if you're shaping a batard or into a large circle if you're shaping a boule.
- Brush the olive oil evenly over the surface of the dough rectangle. Scatter the garlic slices evenly over the dough, followed by the chopped herbs. Finish by sprinkling Parmesan cheese over the top, if using.
- Batard Shaping: Roll the two short outer edges of the dough inward toward the center until they meet. Then, starting from the bottom edge closest to you, roll the dough up tightly into a cylinder. (See step-by-step photos in the recipe post.)
- Fold the short ends of the dough under the dough ball.
- Use a bench scraper to pull the long sides of the dough under the bottom and shape the dough into a more uniform cylinder. This creates surface tension on the outside of the loaf which helps it rise better in the oven. Repeat on both long sides of the dough ball until a uniform cylinder is formed. The outer layer of dough should be stretched tight around the inside dough.
- Boule Shaping: Fold the edges of the dough towards the middle.
- Fold all the edges toward the middle to form a round shape.
- Squeeze the seams together to form a ball.
- Flip the dough ball over and use a bench scraper to pull the sides of the dough under the bottom. This creates surface tension on the outside of the loaf which helps it rise better in the oven. Repeat on all sides of the dough ball until a uniform circle is formed and the outer layer of dough is stretched tight over the inside dough.
- Place the shaped dough seam-side up in a floured banneton or cloth-lined bowl.
- Seal the bottom edges of the dough ball together. Cover the banneton and refrigerate for at least 1 hour or up to 24 hours for a really crispy crust. The sweet spot is around 3-4 hours for this recipe.
- Place the Dutch oven in a cold oven and preheat it to 500°F. Preheat for at least 1 hour.
- Place the shaped dough, seam side down, on a piece of parchment paper. Score it with a razor blade or bread lame. It needs at least one big slash on the side of the dough to let out steam as it rises. You can add decorative scoring as well, but it isn't necessary.
- Place the dough on parchment paper in the preheated Dutch oven and cover it with the Dutch oven lid. Reduce the oven heat to 450°F. Bake for 23 minutes.
- Remove the lid and bake for an additional 12-14 minutes.
- Remove the bread from the oven and let it cool completely on a cooling rack.
Sample Schedule:
- 10 am: Feed the starter.
- 6:30 pm: Make the dough. Cover the starter with the lid and refrigerate for up to a week before feeding again.
- 7 pm: Stretch and fold the dough, and cover the bowl.
- 7:30 pm: Stretch and fold the dough, and cover the bowl.
- 8 pm: Stretch and fold the dough, and cover the bowl.
- 8:30 pm: Stretch and fold the dough. Cover the bowl and leave it on the counter overnight.
- 6:30 am (next day): Shape the dough and place it in a floured banneton or cloth-lined bowl. Cover and refrigerate.
- 10 am: Place the Dutch oven in the oven and preheat the oven.
- 11 am: Score dough, reduce the oven temperature and bake. Let the bread cool completely on a wire rack.
- 3 pm: Place the bread in a zippered bag to soften the crust (optional).
- 6 pm: Eat!
Notes
- You can use any combination of fresh herbs in this bread, or stick to just one. Use 1 tablespoon total for a subtle herb flavor, or up to 2 tablespoons for a more fragrant loaf.
- Not all bread flours are created equal. The protein content and type of wheat used can drastically affect the outcome of your bread. I get the best results with King Arthur flour which has a higher protein content than most bread flours. That's not to say you can't use any type of bread flour, but you may have to test the recipe a few times and adjust it to your liking.
- Stretching and folding should occur 4 times, every 30 minutes but this doesn't have to be exact. You can let the dough rest for as little as 20 minutes up to an hour between stretching and folding if you forget about it.
- Shaping is super important to creating surface tension on the outside of the dough to help the dough rise during baking. See the recipe post for a full photo tutorial of stretching, folding, and shaping.
- Oven times are what works for my oven. I have a gas oven. Your oven is likely different and it may take some time to get the timing right!
- Let the bread cool fully before slicing it. The bread continues to bake and set up as it cools. As tempting as it may be to cut into it right away, don't do it! You'll likely end up with gummy slices of bread.
- Placing the bread in a zippered bag or airtight container lets the moisture from the inside of the loaf soften the crust so it's easier to slice. It's not a necessary step but can be helpful.


Annie Weisz says
If you love garlic bread, you have to try this one! The fresh garlic, herbs, and parmesan make this loaf so flavorful, and it's perfect alongside a cozy bowl of soup or just sliced warm with a little butter. Let me know if you give it a try!